Long Text element
This element is used for long text passages like product descriptions, sidebars, news articles - or even whole pages. The text content of this element can be formatted by the user with some rudimental formatting options (like bold text or bullet lists). If you as the designer wish to stay in partial control of the text styling, then the long text element is a good choice. The formatting possibilities are listed below.
The Long Text element code
<?php webyep_longText("Fieldname", false, "", true, 600, 400); // WebYepV2 ?>
Arguments for the function call
- "Fieldname": A string - the field name for this element.
-
true/false: A boolean - the scope for this element.
true if the element should have the same content on all pages (global).
false if it should have different content on each page it appears on - "": A string - obsolete, pass an empty string ("").
-
true/false: A boolean - whether email links should
be encoded.
true if email addresses entered in the text element should be encoded using Javascript.
false if they should be simply output as HTML. - 600, 400: Maximum width and height of the editor window.
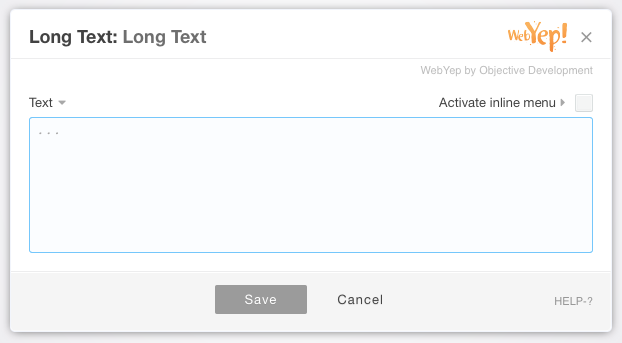
Screenshots
Formatting options
The user can use the following formatting options to format the text entered:
|
when entering the text |
the text will be displayed as |
e.g.: |
||||||
|
http://www.test.com |
A link to www.test.com - the target page will be displayed in a new browser window (target = "_blank")! |
|||||||
|
test@company.com |
A link to the entered email address (a "mailto" link). The link might be encoded to keep SPAM spiders from steeling the email addresses. See Encoding mail links for details. |
|||||||
|
|
The text "Click here to get to the other page" as a link to "someotherpage.php". The user can also enter full URLs ("http://xxx.yyy.com/xxx/yyy.html"). Note the space between the URL and the link text! No new browser window will be opened - the target page will be displayed in the same window. |
|||||||
|
|
The text "Some bold text" formatted in bold font (using the <strong> tag) |
Some bold text |
||||||
|
|
The text "Some text in a special style" formatted with the CSS style "EXAMPLE" (using <span class="EXAMPLE">...) This way you as the web designer can create any CSS style to be used by the users (that edit the content) - just remember that the style name must be all uppercase! |
Some text in a special style |
||||||
--- |
A horizontal ruler. The three dashes must appear at the beginning of a line! |
|
||||||
|
* First list item |
By placing an asterisk (or the bullet symbol) at the beginning of a text line, this line gets formatted as a bullet list item. The bullet will be displayed as a small black dot or (via CSS) as some arbitrary GIF or JPG image. See "Formatting lists" below. The user can also span list items across several lines (inserting line breaks in an item) if the consecutive lines start with a space character. |
|
||||||
|
* First item |
You can place several lines of text into a single list item by placing two spaces at the beginning of the line. |
|
||||||
|
* <BOLD First item> |
You can also combine different formatting commands. |
|
||||||
|
+ First list item |
By using a "+" (plus) instead of the asterisk, an ordered list is created. How to list is numbered (and other visual attributes) depends on the CSS styles for the <ol> and <li> tags you set up for the page. See "Formatting lists" below. |
|
||||||
|
aaa | bbb | ccc |
By using the "|" symbol you can create simple tables. The "|" serves as the column delimiter. The look of the table must be defined by creating CSS styles for the <table> and/or <td> tags – see "Formatting tables" below. |
|
The formatting option <EXAMPLE Some text in a special style> assumes that you have defined a CSS style ".EXAMPLE" in your page/website. It is important to use only uppercase letters in such CSS styles.
Placing the Long Text element
Please always remember that the Long Text element produces HTML code!
When the user creates a bullet list for example the Long Text Elements
creates <ul> and <li> HTML tags.
Thus it is important to place the Long Text Element at a position in
your page where such HTML tags are allowed!
The safest place is inside a
<div> tag. Not ideal would be a paragraph (<p>
tag) as HTML does not allow bullet lists inside a paragraph.
If you find your Long Text element placed inside a
<p> tag you can change it into a
<div> tag by clicking the <p> tag in the Tag
Selector with the right mouse button and choose "Edit Tag...".
Formatting lists
The Long Text Element creates bullet lists by using the
<ul> and <li> HTML tags.
Therefore you can format these lists by defining CSS styles for these
tags.
For example you could create a style:
ul {
  list-style-position: outside;
  list-style-image: url(bullet.gif);
}
to define the image "bullet.gif" as the bullet symbol used in all lists.
If you want your style to only change the look of lists inside the
WebYep Text Element (and not all lists in the page), embed the Text
Element in a <div> tag, give that tag a CSS class
(class="someclassname") and change the name of the above style from
"ul" to ".someclassname ul".
To only style list items of a specific indention level, you need to repeat the tag name ("ul") in the CSS style's name (selector):
.someclassname ul ul { .....; }
for instance would only define the style for second level items and deeper, but not the main items.
To style ordered lists created with the "+" sign, use the
ol tag name instead of ul in the style names
above.
Formatting tables
To change the look of tables, you simply create the usual CSS styles for the <table> and/or <td> tag - e.g.:
table {
  margin: 0px;
  padding: 0px;
  border-top: 1px solid black;
  border-left: 1px solid black;
}

td {
  margin: 0px;
  padding: 6px;
  border-bottom: 1px solid black;
  border-right: 1px solid black;
}
If you want your styles to only change the look of tables
inside the WebYep Text Element (and not all tables in the
page), embed the Text Element in a <div> tag, give
that tag a CSS class (class="someclassname") and change
the name of the above styles from table to
.someclassname table and from td to
.someclassname td.
Attributes of the Long Text element
Fieldname
A distinctive name for that element. This name will be displayed in the page in edit mode to give the user a hint on what this elements content stands for and to distinguish the different WebYep elements in a page.
Content
When set to "for this doc only" the elements content is unique for this page - even if another element on a different page has the same name. If set to "for all documents" the content will be the same on all pages for elements of this kind that use the same name.
Encode email links
If a user enters an email address into a Long Text Element, WebYep will display it as a clickable link ("mailto" link).
If you enable the "Encode Email Links" option, WebYep will encode these links to keep SPAM spiders from collecting the email addresses.
To do so, WebYep uses a Javascript based encoding. If the visitors of your website have deactivated Javascript, they will only see these email addresses in the form:
name(_AT_)domain.com
and the email addresses will then not be clickable.
Modal window size
As the developer you can preset the dimensions of the modal window size.