Image Gallery element
The WebYep Image Gallery Element displays a tabular list of thumbnails that, when clicked on, open the original image/photo. The thumbnails can be rearranged and the user can also add a caption for each uploaded image. The original image will normally be opened in a separate window, but you can also use a lightbox to open it in the same window (see below). You can place several Image Gallery elements on a page, or combine it with the Loop element.
The Image Gallery element code
<?php webyep_gallery("fieldname", false, 35, 35, 30, 900, 600, 35, 600, 400); // WebYepV2 ?>
Arguments for the function call
- "Fieldname": A string - the field name for this element.
-
true/false: A boolean - the scope for this element.
true if the element should have the same content on all pages (global).
false if it should have different content on each page it appears on - 60: An integer - the maximum width of the thumbnail.
- 70: An integer - the maximum height of the thumbnail.
- An integer - the number of columns for listing the gallery image thumbnails.
- 600: An integer - the maximum width of the image, or zero if it should not be limited.
- 700: An integer - the maximum height of the image, or zero if it should not be limited.
- 100: An integer - the width, in pixels, of the thumbnail columns.
Screenshots
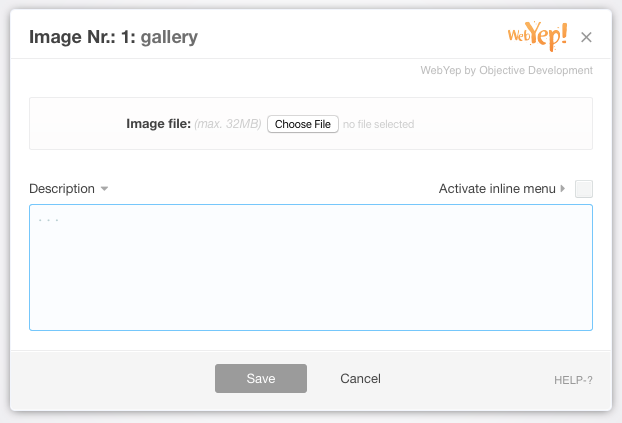
How the Image Gallery works
Users can upload new images directly with the web browser. Clicking the plus button will add a new image after the one the plus button belongs to. Clicking the "Edit" button lets the user change the image or the caption.
Depending on the web browser used you can upload multiple images at once by holding down the CMD key (on Mac OS) or the CTRL key (on Windows) to select multiple files in the file selection dialog.
The description entered will be used for all uploaded images - but you can of course edit the description afterwards.
Enabling a lightbox effect
The WebYep Galery Image element (as well as the Image element) supports a Javascript lightbox effect (based on Prototype/Scriptaculous- https://github.com/lokesh/lightbox2/releases/tag/v2.05-newdemopage), Slimbox (based on Mootools - http://www.digitalia.be/software/slimbox/) and Lightbox (based on jQuery - http://lokeshdhakar.com/projects/lightbox2). If one of these is installed, the detail (zoomed) image of a WebYep Image or Gallery element will not open in a separate browser tab or window, but in the page itself as an overlay.
These effects are bundled with WebYep and can be found in the /opt/ folder along with their creator's web sites and details. To choose a lightbox type, please see the complete options page.
Formatting the gallery
WebYep assigns special CSS style classes to the Image Gallery Element's items. By defining styles for these CSS classes in your page's stylesheet, you have detailed control of the look of your WebYep Gallery. You can use the web developer tools in your browser to see the class names applied to the gallery or refer to this table:
| CSS Class Name | Assigned, to.... |
| WebYepGalleryContainer |
the <table> tag containing the whole gallery.
You can style the rows and cells of that table with the CSS
selectors: |
| WebYepGalleryFirstRow |
the first <tr> tag in the gallery. |
| WebYepGalleryFirstColumn |
the first <td> tag in a row. |
| WebYepGalleryImage |
the <div> tag surrounding the thumbnail image.
You can style the actual image with the CSS selector: |
| WebYepGalleryText | the <div> tag surrounding the caption. |
Attributes of the Image Gallery element
Gallery name
A distinctive name for that element. This name will be displayed in the page in edit mode to give the user a hint on what this elements content stands for and to distinguish the different WebYep elements in a page.
Content
When set to "for this doc only" the elements content is unique for this page - even if another element on a different page has the same name. If set to "for all documents" the content will be the same on all pages for elements of this kind that use the same name.
Maximum thumbnail width and height
The thumbnails for each image will be generated so that they are not wider/higher than specified here - they are resized according to the image's proportions. The resulting thumbnail will have exactly either the specified width or height.
Maximum image width and height
If specified, the uploaded image will be proportionally resized so that it is not wider than the max. width setting and not higher than the max height setting. If not specified, the uploaded image will be left unchanged.
Resizing is always done proportional (the aspect ration is kept the same).
Note: Resizing can only be done, if the GD extension for PHP is installed on the server. If not, the Change Image Window in the browser will display a warning and images will only be displayed in the specified sizes, but not actually be downsized (and therefore the file size will stay the same).
Number of cells
The thumbnails of all images will be shown in a div which looks like a table - the number of columns of that table can be specified with the "Number of Cells" attribute.
Cell width
The thumbnail cells' width in pixels - would normally be wider than the maximum width of the thumbnail and wide enough to hold the typical image caption.
Modal window size
As the developer you can preset the dimensions of the modal window size.